'98 Grand Cherokee V8 Auxiliary Transmission Oil Cooler: By: Scott Mueller scottmueller@compuserve.com.
All V8 Grand Cherokees built from '93 through '97 included two transmission coolers. The primary cooler is built in to the RH (passenger side) radiator tank, and an auxiliary cooler was mounted in front of the radiator on the RH side, attached to one of the grille supports. They were run in series, with the fluid first running into the bottom of the radiator tank, then out the top and into the external cooler, and then back to the transmission. Strangely, for '98 Jeep eliminated the auxiliary cooler from all V8 Grand Cherokees, even on the 5.9 Limited model and even models with the trailer towing package! Since I purchased the 5.9L and intended to tow, I thought that adding back the external cooler was a necessity.

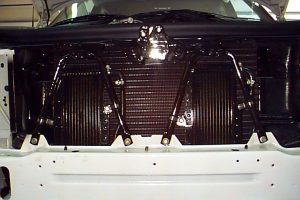
The picture ZJtrans-cool.jpg shows the transmission cooler mounted in front of the radiator on the RH (passenger) side.

The picture above shows both the transmission and power steering coolers mounted.
The power steering cooler is something that I added and have described in a separate article. The only real problem with installing the factory cooler used on all the '97 and earlier models is that Chrysler parts doesn't stock or sell a complete kit with all of the small parts you'll need, such as the clips, bolts, clamps, etc. This means you'll have to procure them separately, a minor hassle. Here is the list of the factory parts needed to install the factory auxiliary trans oil cooler on a '98 GC with either the 5.2L or 5.9L V8. (all '98s lack the cooler formerly installed on all '97 and earlier V8s): P/N Description Price Notes ------------------------------------------- 52006344 Aux. Cooler $79.40
- 52079590 Pressure line $23.35
- 52079591 Return line $6.97
- 52027684 Elbow $4.62 (2 reqd.)
Optionally you can use a third hose elbow to mate the existing line from the top of the radiator cooler to the line going to the external cooler. In that case you should purchase a 3rd elbow. You will also need the following misc. items: Qty Description --------------------------------------------------- 2 Cushioned 5/8" P-clips (Adel clamps) 2 M6-1.00 x 15 self-tapping flanged bolts (or use washers if non-flanged) 2 Feet of 3/8" trans cooler hose 1 3/8 male flare to 3/8 male NPT adapter (brass) 6 8-16 worm gear hose clamps Optionally you can cut the existing hard line going into the radiator top fitting and attach a hose elbow directly to it, instead of purchasing a flare to NPT adapter. These latter items can be obtained at most hardware or marine supply stores. I used all stainless steel P-clips, bolts, and hose clamps which I obtained at a local Marine supply store. Since they are somewhat visible behind the grille, I wanted stainless steel parts which would never rust or corrode. This is an improvement over the non-stainless parts that Jeep used on the '97 and earlier models from the factory. Alternatively you can get all of this hardware from McMaster-Carr http://www.mcmaster.com, an industrial supply house. As for the installation, I recommend you have the FSM (Factory Service Manual) on hand before starting. It has detailed instructions on removing and installing some of the components. The basic instructions are as follows:
1.) Remove the grille, fascia (bumper), and grille opening reinforcement (GOR), to gain access.
2.) Mount the cooler behind the RH triangular radiator support, with the inlet and outlet towards the center of the vehicle. The existing upper support screw is used, and then the two P-clips and additional screws you obtained will attach the cooler to the sides of the radiator support.
3.) Disconnect the stock trans cooler return hose from the radiator and remove from the line at the base of the engine. Some fluid will dribble out (have a catch pan ready). Remove the existing fitting in the radiator and install the new 3/8" brass fitting you purchased. You can't bolt the new line directly to the radiator because the fitting type changed in '98. Optionally you can cut the hard line coming from the top of the radiator a few inches below the bend, and similarly cut the hard line routed to the external cooler, and use a hose elbow to join the ends. That is what I did as I didn't have a flare to NPT adapter at the time. 
The picture ZJtrans-cool-connect.jpg shows the stock (cut) hard line and junction hose elbow slipped on just below the bend in the hard line. This was a simple trick and has proven fluid tight for several years now.
4.) Install the rubber elbows and new lines on the cooler using worm-gear clamps, you'll see that the pre-bent lines snake nicely around the RH radiator side tank.
5.) Attach the aux. cooler pressure line to the new 3/8" flare fitting on the radiator. 6.) Install a new piece of 3/8" hose from the new return line to the return line at the base of the engine and secure with clamps.
7.) Make sure all connections are tight and run the engine to check for leaks. Then re-install the GOR, fascia and grille.
That's it! Your transmission will now live longer with this upgrade, especially in severe service use such as towing. Scott.

